Forum Replies Created
-
AuthorReplies
-
At that distance, the only way to come close to focusing just a slash of light on the glasses would be to use a Source 4 Leko with something narrow like a 19 degree lens, then use the leaves to create a slash.
Though painting a face isn’t politically correct, so to speak, that’s how Gregg Toland solved the problem in “Ball of Fire” of only seeing Barbara Stanwyck’s eyes in a dark room where her face wasn’t supposed to be visible to the other character played by Gary Cooper. So Toland asked the make-up department to paint Stanwyck’s face black in the morning when she arrived — she phoned the set back and said “what in the hell sort of movie are we making?!?” But it worked!

There’s no way to answer this question in the abstract. Obviously if you had a ring of lightbulbs with enough space between them to put a paper lantern around them, you’d create a larger and thus softer source.
The rule regarding the size of a light source relative to the subject affecting softness still applies. In theory, a paper lantern is a bigger source than a bare light bulb unless the paper lantern is far enough away to be the same physical size relative to the subject as the bare light bulb. If you had a ring of paper lanterns the same distance away as a ring of bare light bulbs, thus larger in size as a source, the light would be softer, at least in one direction (if the bare bulbs were very close together then they would be soft in the direction of the ring but less soft at a right angle to the ring — it’s like comparing a bare 4′ fluorescent tube to a 4′ x 2′ LED soft light, the softness is the same in the long direction but not in the short direction.)
But the reasons you might build a ring light is partly (or mainly) related to size and weight, you are trying to create something with a low profile that can fit close to the ceiling and perhaps augment and spread the light from a practical lamp hanging from the ceiling. In this case, a ring of paper lanterns might hang down too low from the ceiling to be out of the shot. So the scenarios in which you’d use one approach versus the other are different.
When faking sunlight, the goal is generally to be convincing… the trouble is that typically in a real day exterior with sunshine, you wouldn’t be shooting at f/2.0, let’s say, you’re more likely to be stopped down to f/4.0 or deeper. So super shallow-focus is sort of a giveaway that the daylight scene is artificially lit.
When Sven Nykvist filmed “Cannery Row” (1982), which had indoor sets that were supposed to be outdoors in daylight, he knew this would be a problem so he tried to shoot his real day exteriors at a wide aperture and his interior day “exteriors” at a stop deeper than wide-open so they had a similar feeling.
Shining a flashlight at him will just create a bright spot in the eyeglasses and add fill light. Yes, diffusing a pair of mirror sunglasses might do the trick but it would be better to light the opposite direction of where the person is looking as brightly as possible, though it would have to be a large flat wall or building, something that had a chance of filling the reflection of the glasses. Then the face could be kept dark.
But if the reverse view does not lend itself to creating a bright reflection, then try dull-spraying a pair of mirrored sunglasses and hit them with some frontal light, just beware that you’re hitting the face with light.
You forgot #4: Use tungsten lights and dim them for more warmth
All of your choices are valid, it just depends on what is the more practical or efficient method, like whether there are practical lamps in the shot of “x” color temperature that cannot be changed and thus you have to consider whether to match your additional lighting to those.
I can’t answer that, it’s up to you! If there’s moonlight coming through the window behind him, haze in the room might do a better job of creating separation rather than a hair light. But if there’s no haze then some soft backlight motivated by the window in the background might be good in a very dark scene to see some shapes. But it’s really your call!
The main difference between doing it with color temperature camera settings versus gels on lights is that when you do it to the camera setting, it’s an overall shift — with gels on lights, or dimmers on tungsten lights, you can just warm up the lights you want to look warm. (Of course, you could do it by changing the color temperature setting on the camera except now you’d have to add blue gel to the lights you wanted to look less warm… it all depends on which approach is the most practical.)
If it’s motivated, it’s fine, especially in a night interior with multiple lights on — if that’s the look you want. In some environments like a nightclub or big restaurant with lots of sources, it’s even easier to justify one if you want it. It can add a touch of glamour or romance. You just want to be subtle and not overuse the effect.
But I avoid them in day interiors with no artificial lights on if the hair light would be coming from the opposite direction of the windows. And I avoid them when I don’t want to clutter the look of a single dominant source in a room. And I tend to play them on the dim side — if I wanted a true backlight, then I really go for it!
No hair light:

Dim hair light:

Big backlight:

-
This reply was modified 1 year, 1 month ago by
dmullenasc.
-
This reply was modified 1 year, 1 month ago by
dmullenasc.
In the early days of HD, Joe Dunton built a digital back for an Arri-SR16 I believe so one could switch between a film magazine or a S16-sized HD sensor block. And I think Aaton was planning on building a 35mm camera that was switchable to a digital back. One issue with Dunton’s approach was that 2/3″ 3-sensor HD cameras at the time delivered better images than a single S16 sensor with a Bayer pattern.
There are all sorts of reasons why these ideas never caught on, including optical viewfinders — which so many DPs insisted on as being necessary that ARRI made the Alexa Studio, only to barely sell any of them, and the rental houses that did buy one found it sitting unused. There are too many advantages to dropping a spinning mirror reflex system between the lens and a sensor, from weight to size to cost… and with more and more remote-head operating and Steadicam / gimbal work, most of the time the operator was looking at an electronic image anyway. I think Red Camera in the late-2000s basically dared the industry that if enough people ordered a camera with an optical viewfinder, they would build it.
As for the combo film/digital camera, there aren’t enough owner/operators out there who shoot both formats regularly, plus with digital tools improving every year or so, you have the issue of the film-side of the camera never needing updating but the digital-side of the camera needing regular updating. It’s like the trend of building VHS decks into TV sets back in the 1980s — at some point, the deck needed replacing before the TV did, or then DVDs came along and the VHS portion of the TV wasn’t being used.
-
This reply was modified 1 year, 1 month ago by
dmullenasc.
This is pretty minor, but I wish an ND.30 filter was part of the filter wheel inside an Alexa… I’d rather the internal wheel went .30, .60, .90, and 1.2 and let me use glass ND above that when outdoors because in changing light, you are generally pulling or adding one-stop of ND. And indoors, I sometimes have to add a .30 ND in to reduce depth of field.
A modern 4k digital camera with a Super 16mm sensor.
Technically you could get that by using an 8K 35mm sensor camera cropped to Super-16 area… But sure, if a Super-16 sensor allowed one to build a particularly small camera, that could be cool using the old 16mm optics to keep things smaller overall. But I’m not sure of the market demands for a smaller sensor camera, the trends are in the opposite direction.
There’s no right or wrong aspect ratio — I remember the director & DP of “Waterworld” saying that they chose 1.85 over 2.40 because a sailboat on the ocean is a vertical subject… while the director and DP of “White Squall” said they chose 2.40 over 1.85 because the ocean is a horizontal subject!
Composition often either plays with balance or imbalance and I will say that the 2.40 format seems more “modernist” to me because it easier to play with imbalance and negative space in such a wide frame. Whereas 1.37 Academy / 1.33 Silent tends to favor more balanced or even symmetrical framing. Of course there are a ton of exceptions!
“Red Beard”

“How Green Was My Valley”

As Roger says, it is not “cheating” to create a color by the color temperature setting any more than doing it with tungsten vs. daylight-balanced stocks. Keep in mind that the “native” color temperature of a sensor is probably close to daylight (i.e. there is less noise in the blue channel at 5600K compared to setting the camera to 3200K.) Does that mean you are cheating when shooting the camera at 3200K?
And even if you shoot film, a daylight-balanced stock just means that the yellow dye layer (blue information) is slower in speed compared to in a tungsten-balanced stock where it is faster to compensate for a reduction of blue wavelengths in tungsten lighting.
Also remember that if you record raw, then color temperature is just metadata and is only applied during the debayering step to RGB color.
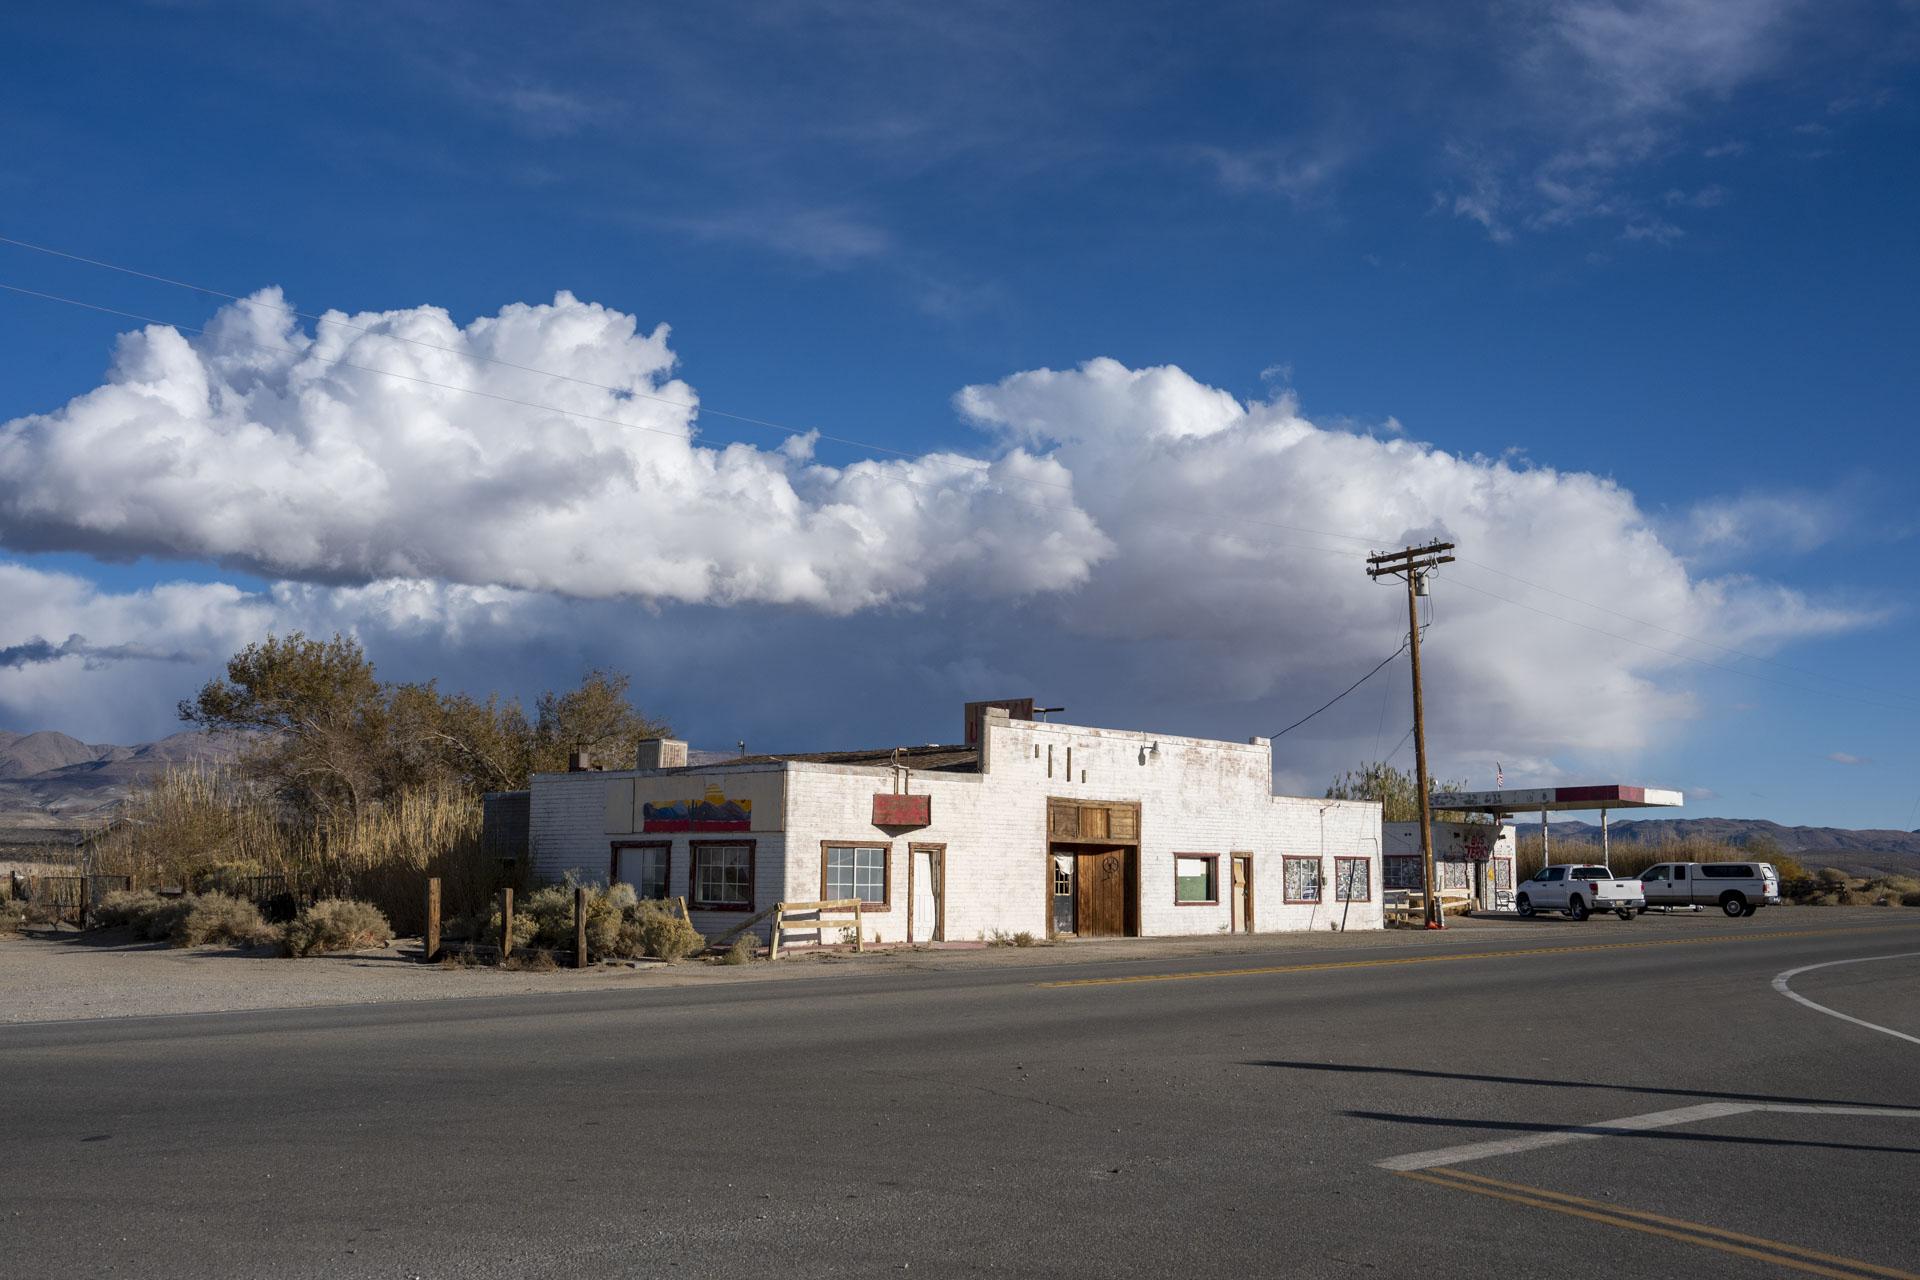
Here is a different approach. First is the straight color photo converted from raw with just some auto adjustments to contrast, etc.

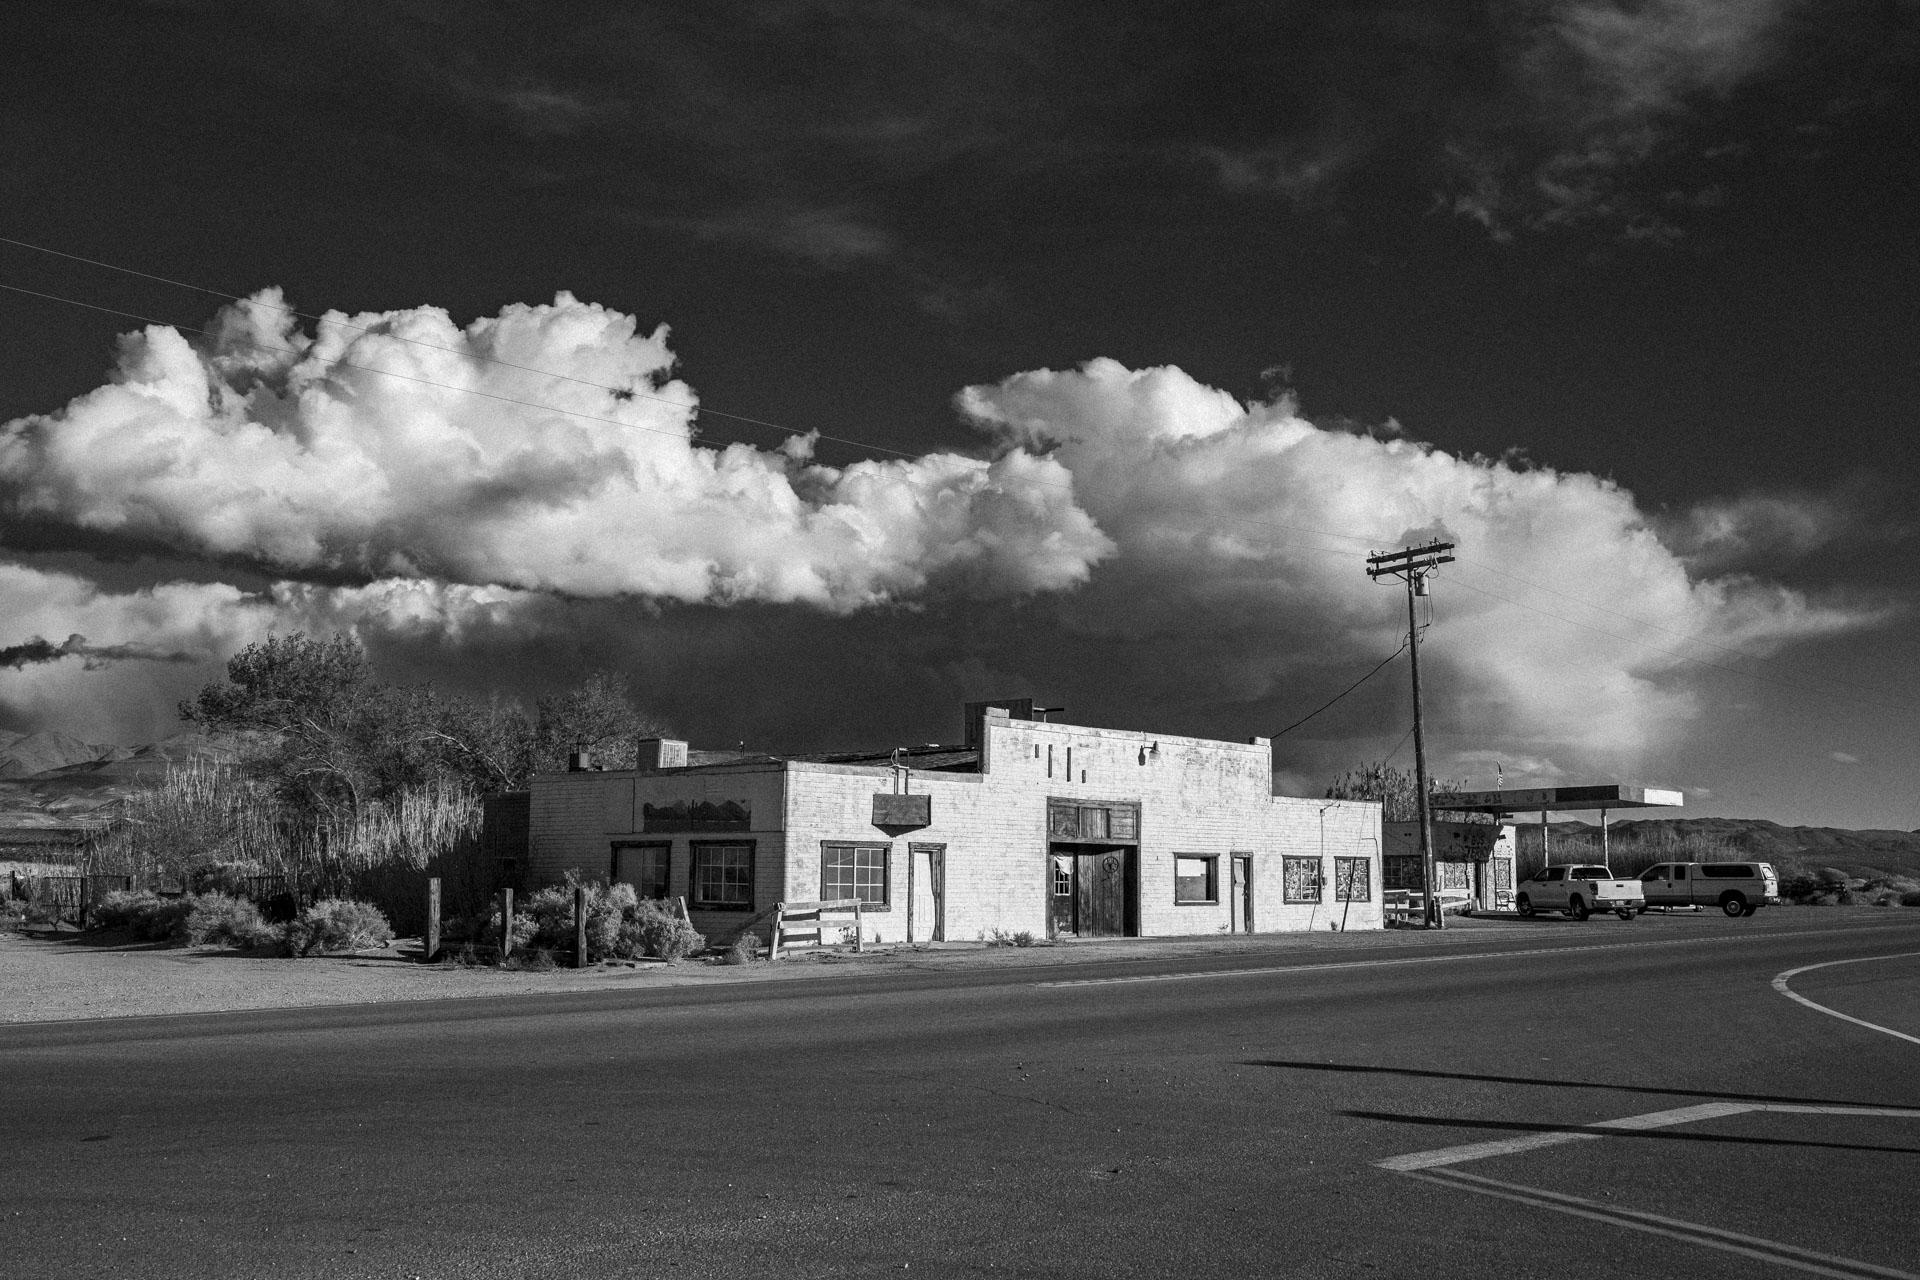
Here is a b&w version where I first darkened the blue channel, then I isolated the sky and added some Dehaze, then I turned it straight to b&w without using an Adobe Profile (plus I added some grain):

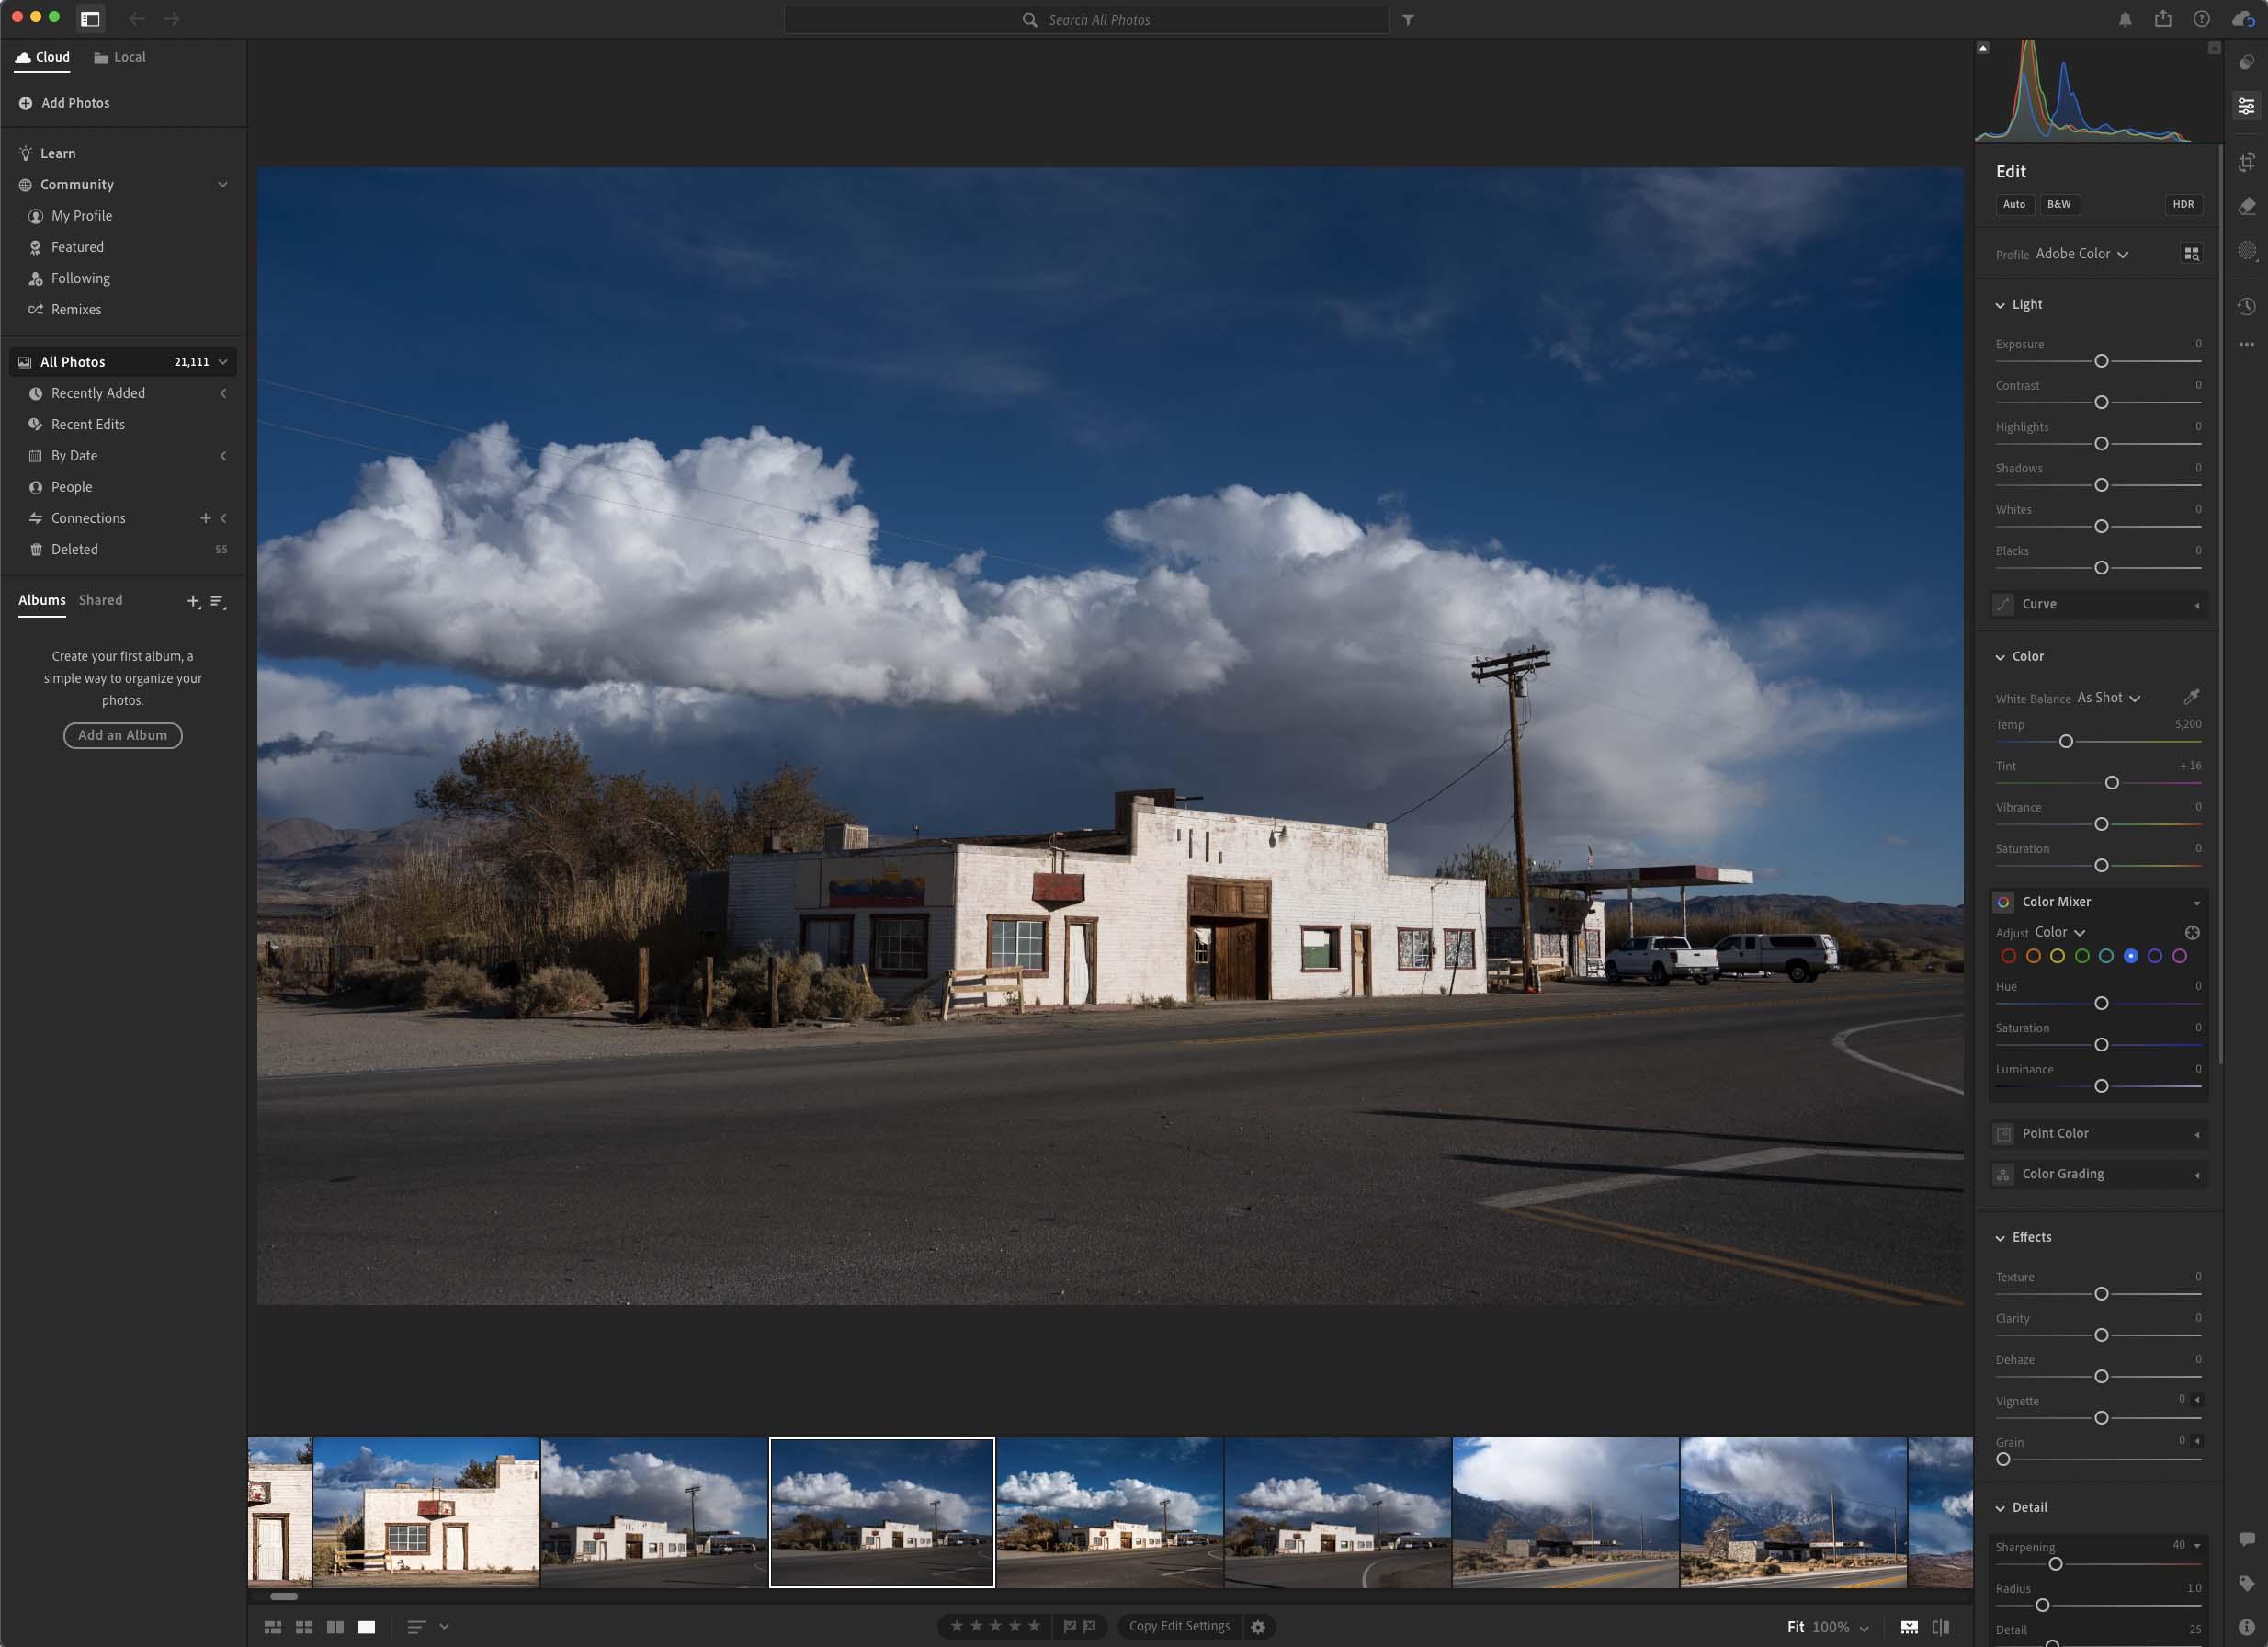
In Lightroom, I’d first convert the raw file to color because then you can first control the luminance of a color channel before conversion to b&w, such as darkening the blues to make a sky darker to simulate an orange or red filter before turning it to b&w.
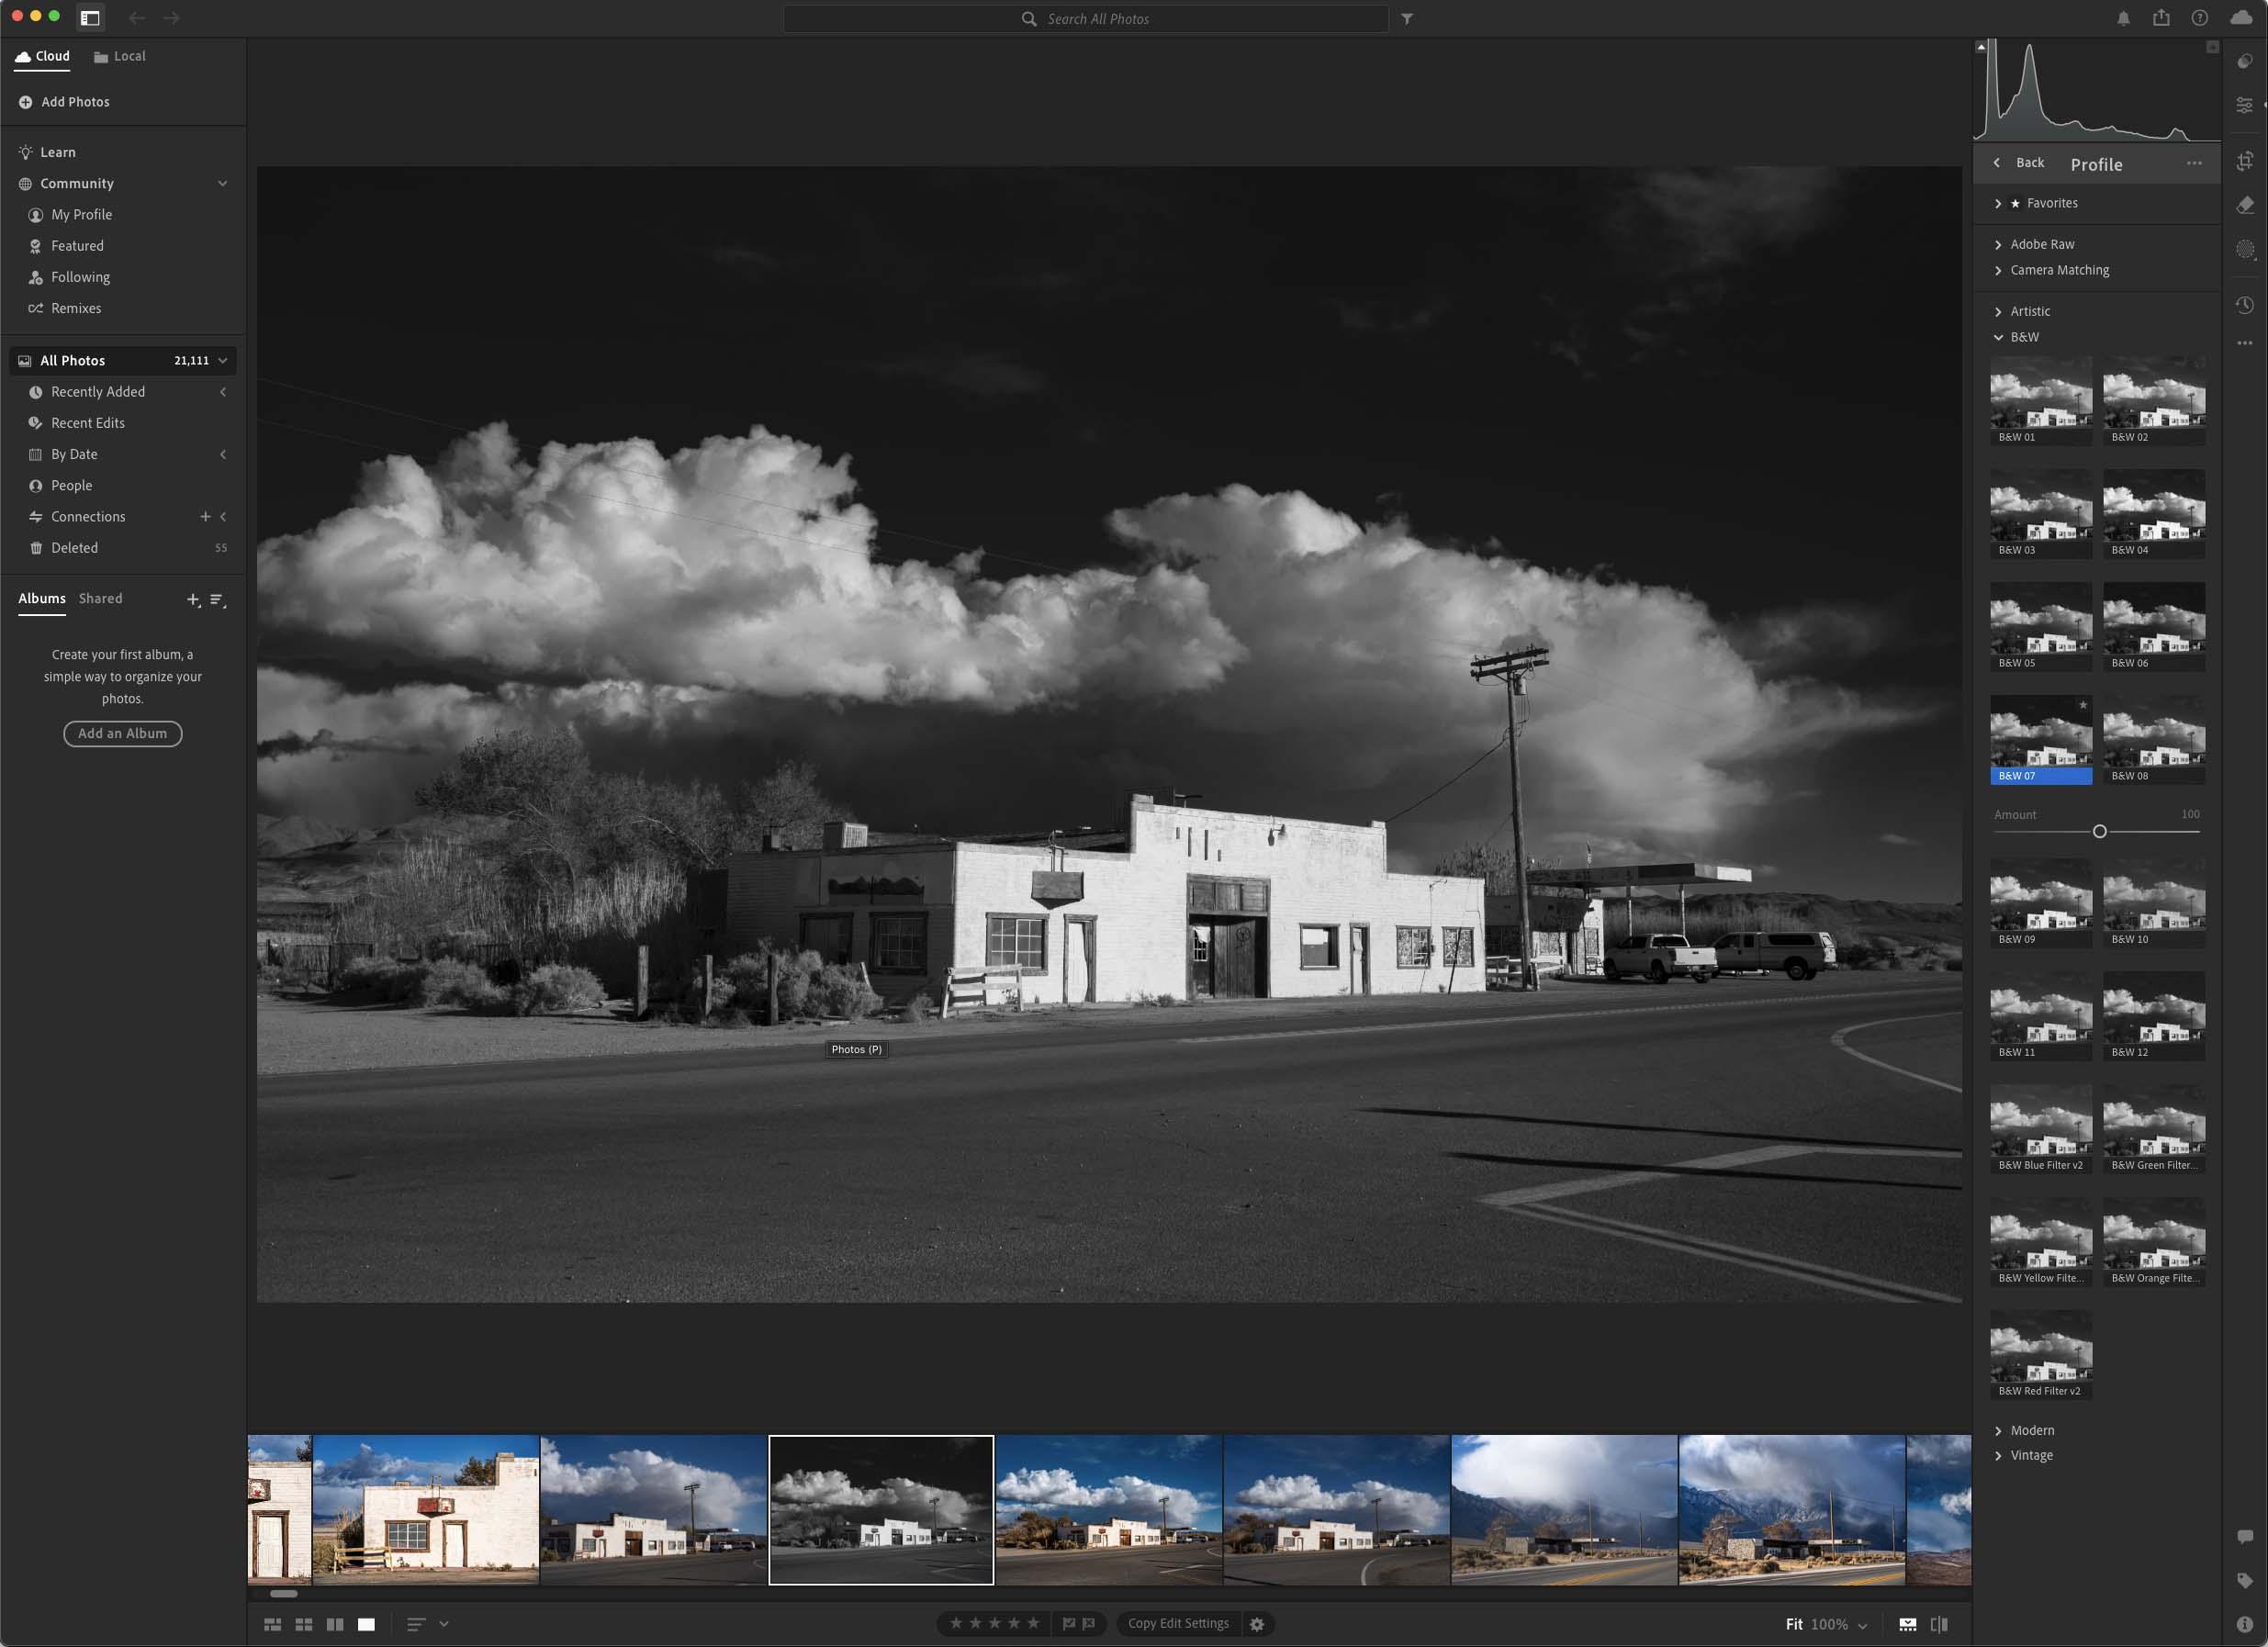
Lightroom also has a number of b&w profiles that do something similar, it’s just that they don’t say what is involved (I think it’s b&w profile #7 that is like using a red filter.)
Here is a Nikon raw file I opened up in Lightroom with no corrections:

This is selecting B&W Profile #7:

-
This reply was modified 1 year, 1 month ago by
dmullenasc.
-
This reply was modified 1 year, 1 month ago by
-
AuthorReplies
