Forum Replies Created
-
AuthorReplies
-
There’s no right or wrong aspect ratio — I remember the director & DP of “Waterworld” saying that they chose 1.85 over 2.40 because a sailboat on the ocean is a vertical subject… while the director and DP of “White Squall” said they chose 2.40 over 1.85 because the ocean is a horizontal subject!
Composition often either plays with balance or imbalance and I will say that the 2.40 format seems more “modernist” to me because it easier to play with imbalance and negative space in such a wide frame. Whereas 1.37 Academy / 1.33 Silent tends to favor more balanced or even symmetrical framing. Of course there are a ton of exceptions!
“Red Beard”

“How Green Was My Valley”

As Roger says, it is not “cheating” to create a color by the color temperature setting any more than doing it with tungsten vs. daylight-balanced stocks. Keep in mind that the “native” color temperature of a sensor is probably close to daylight (i.e. there is less noise in the blue channel at 5600K compared to setting the camera to 3200K.) Does that mean you are cheating when shooting the camera at 3200K?
And even if you shoot film, a daylight-balanced stock just means that the yellow dye layer (blue information) is slower in speed compared to in a tungsten-balanced stock where it is faster to compensate for a reduction of blue wavelengths in tungsten lighting.
Also remember that if you record raw, then color temperature is just metadata and is only applied during the debayering step to RGB color.
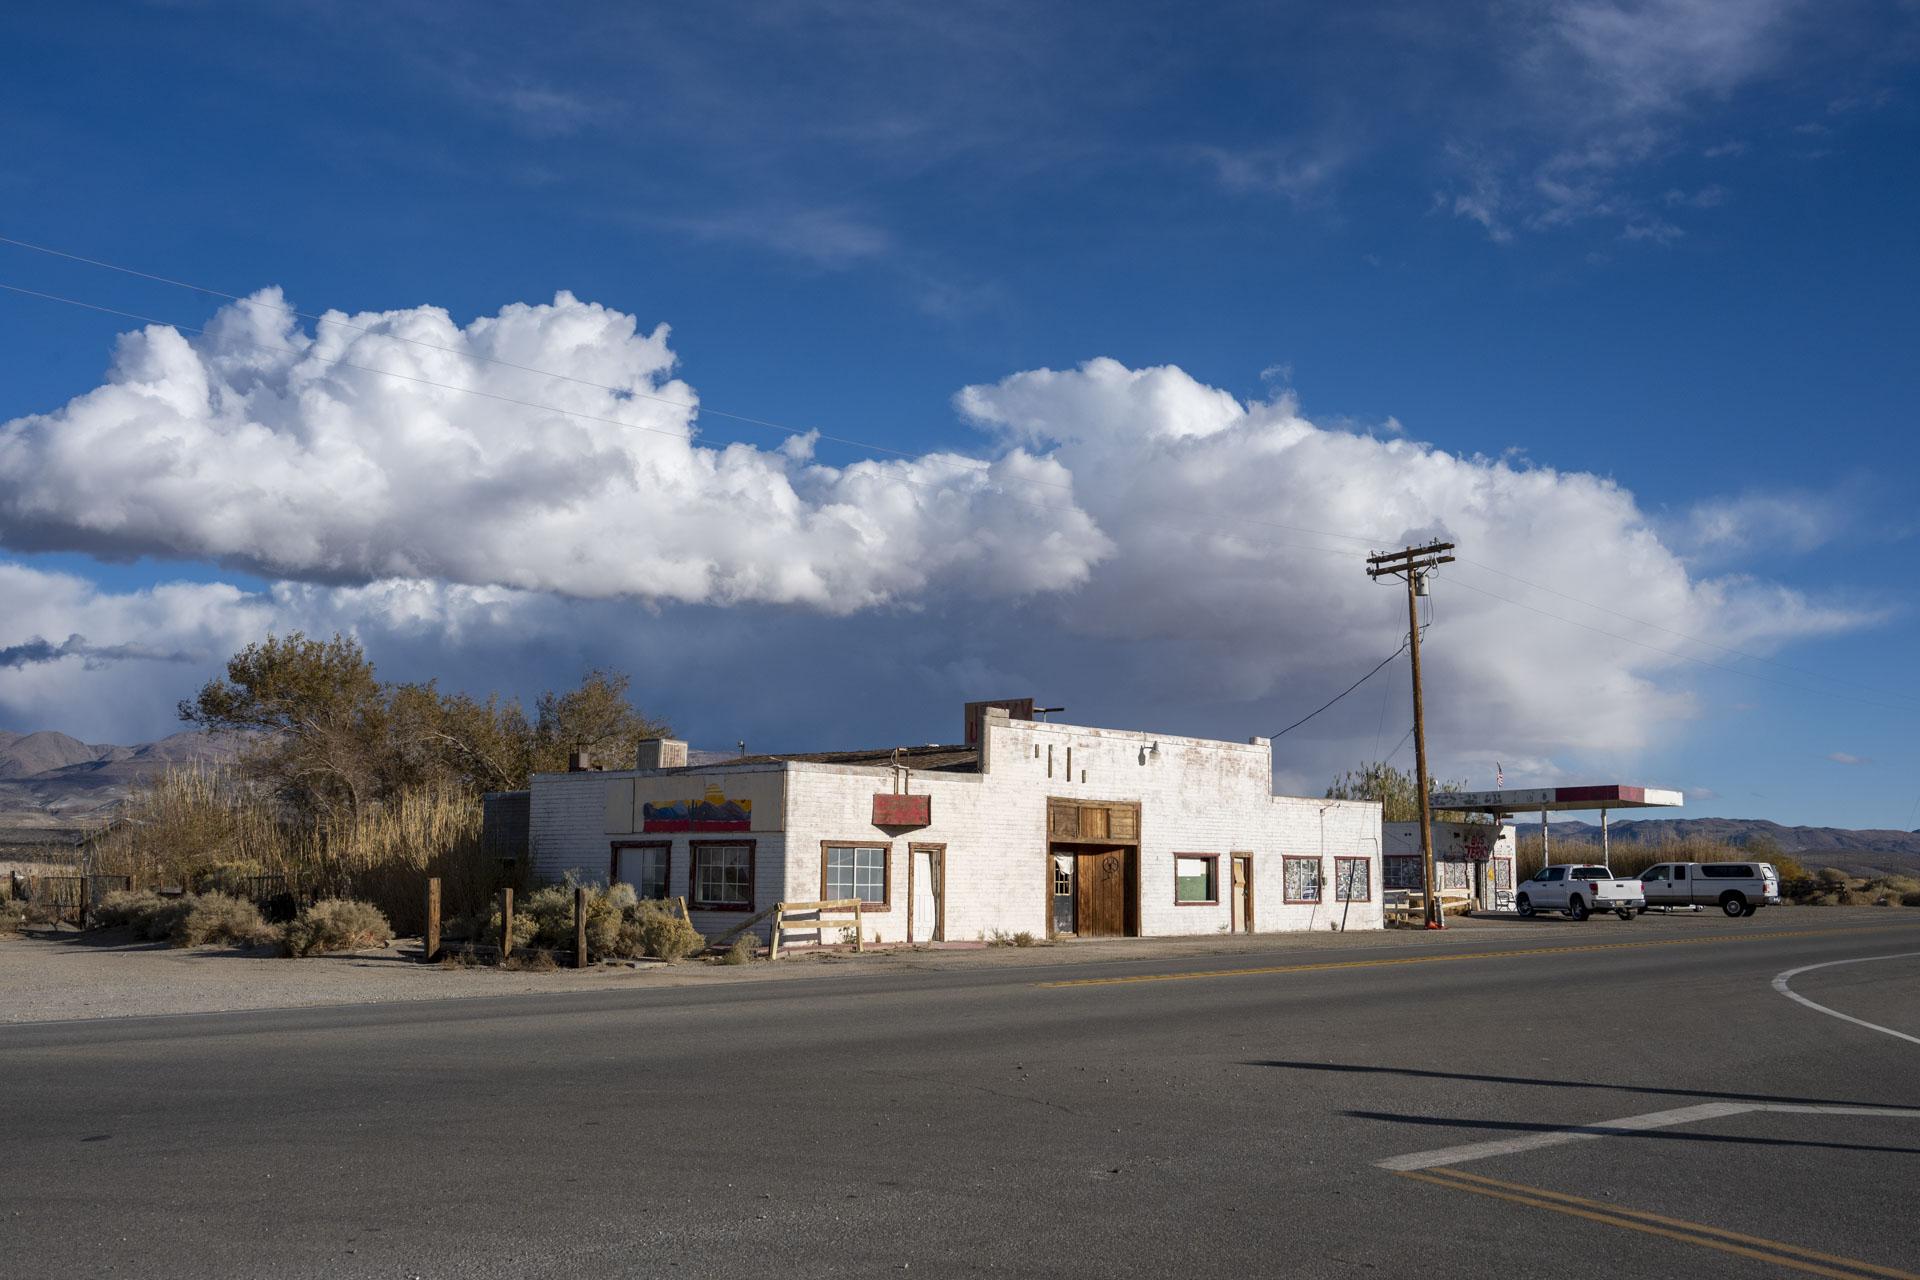
Here is a different approach. First is the straight color photo converted from raw with just some auto adjustments to contrast, etc.
Here is a b&w version where I first darkened the blue channel, then I isolated the sky and added some Dehaze, then I turned it straight to b&w without using an Adobe Profile (plus I added some grain):
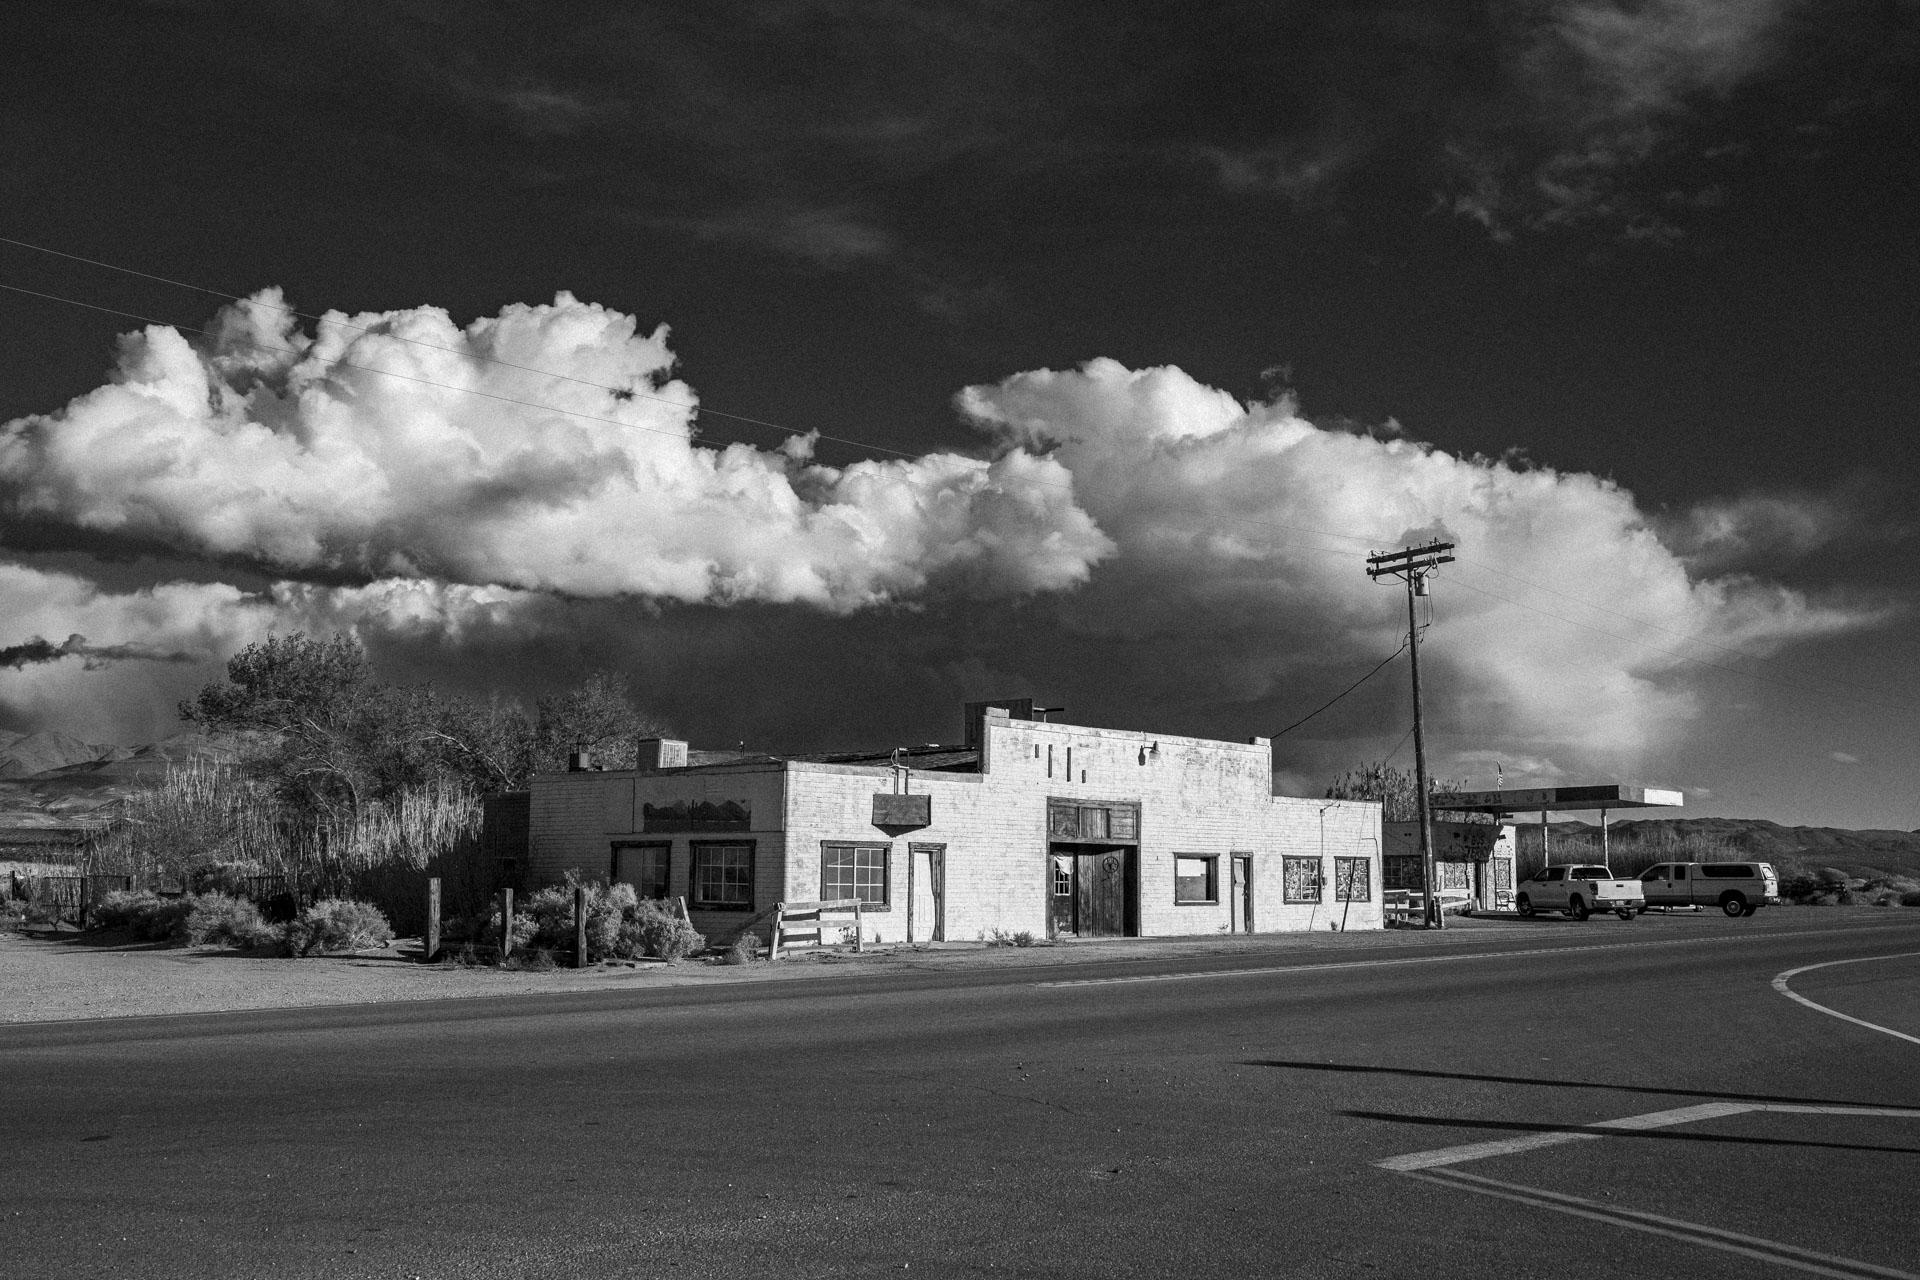
In Lightroom, I’d first convert the raw file to color because then you can first control the luminance of a color channel before conversion to b&w, such as darkening the blues to make a sky darker to simulate an orange or red filter before turning it to b&w.
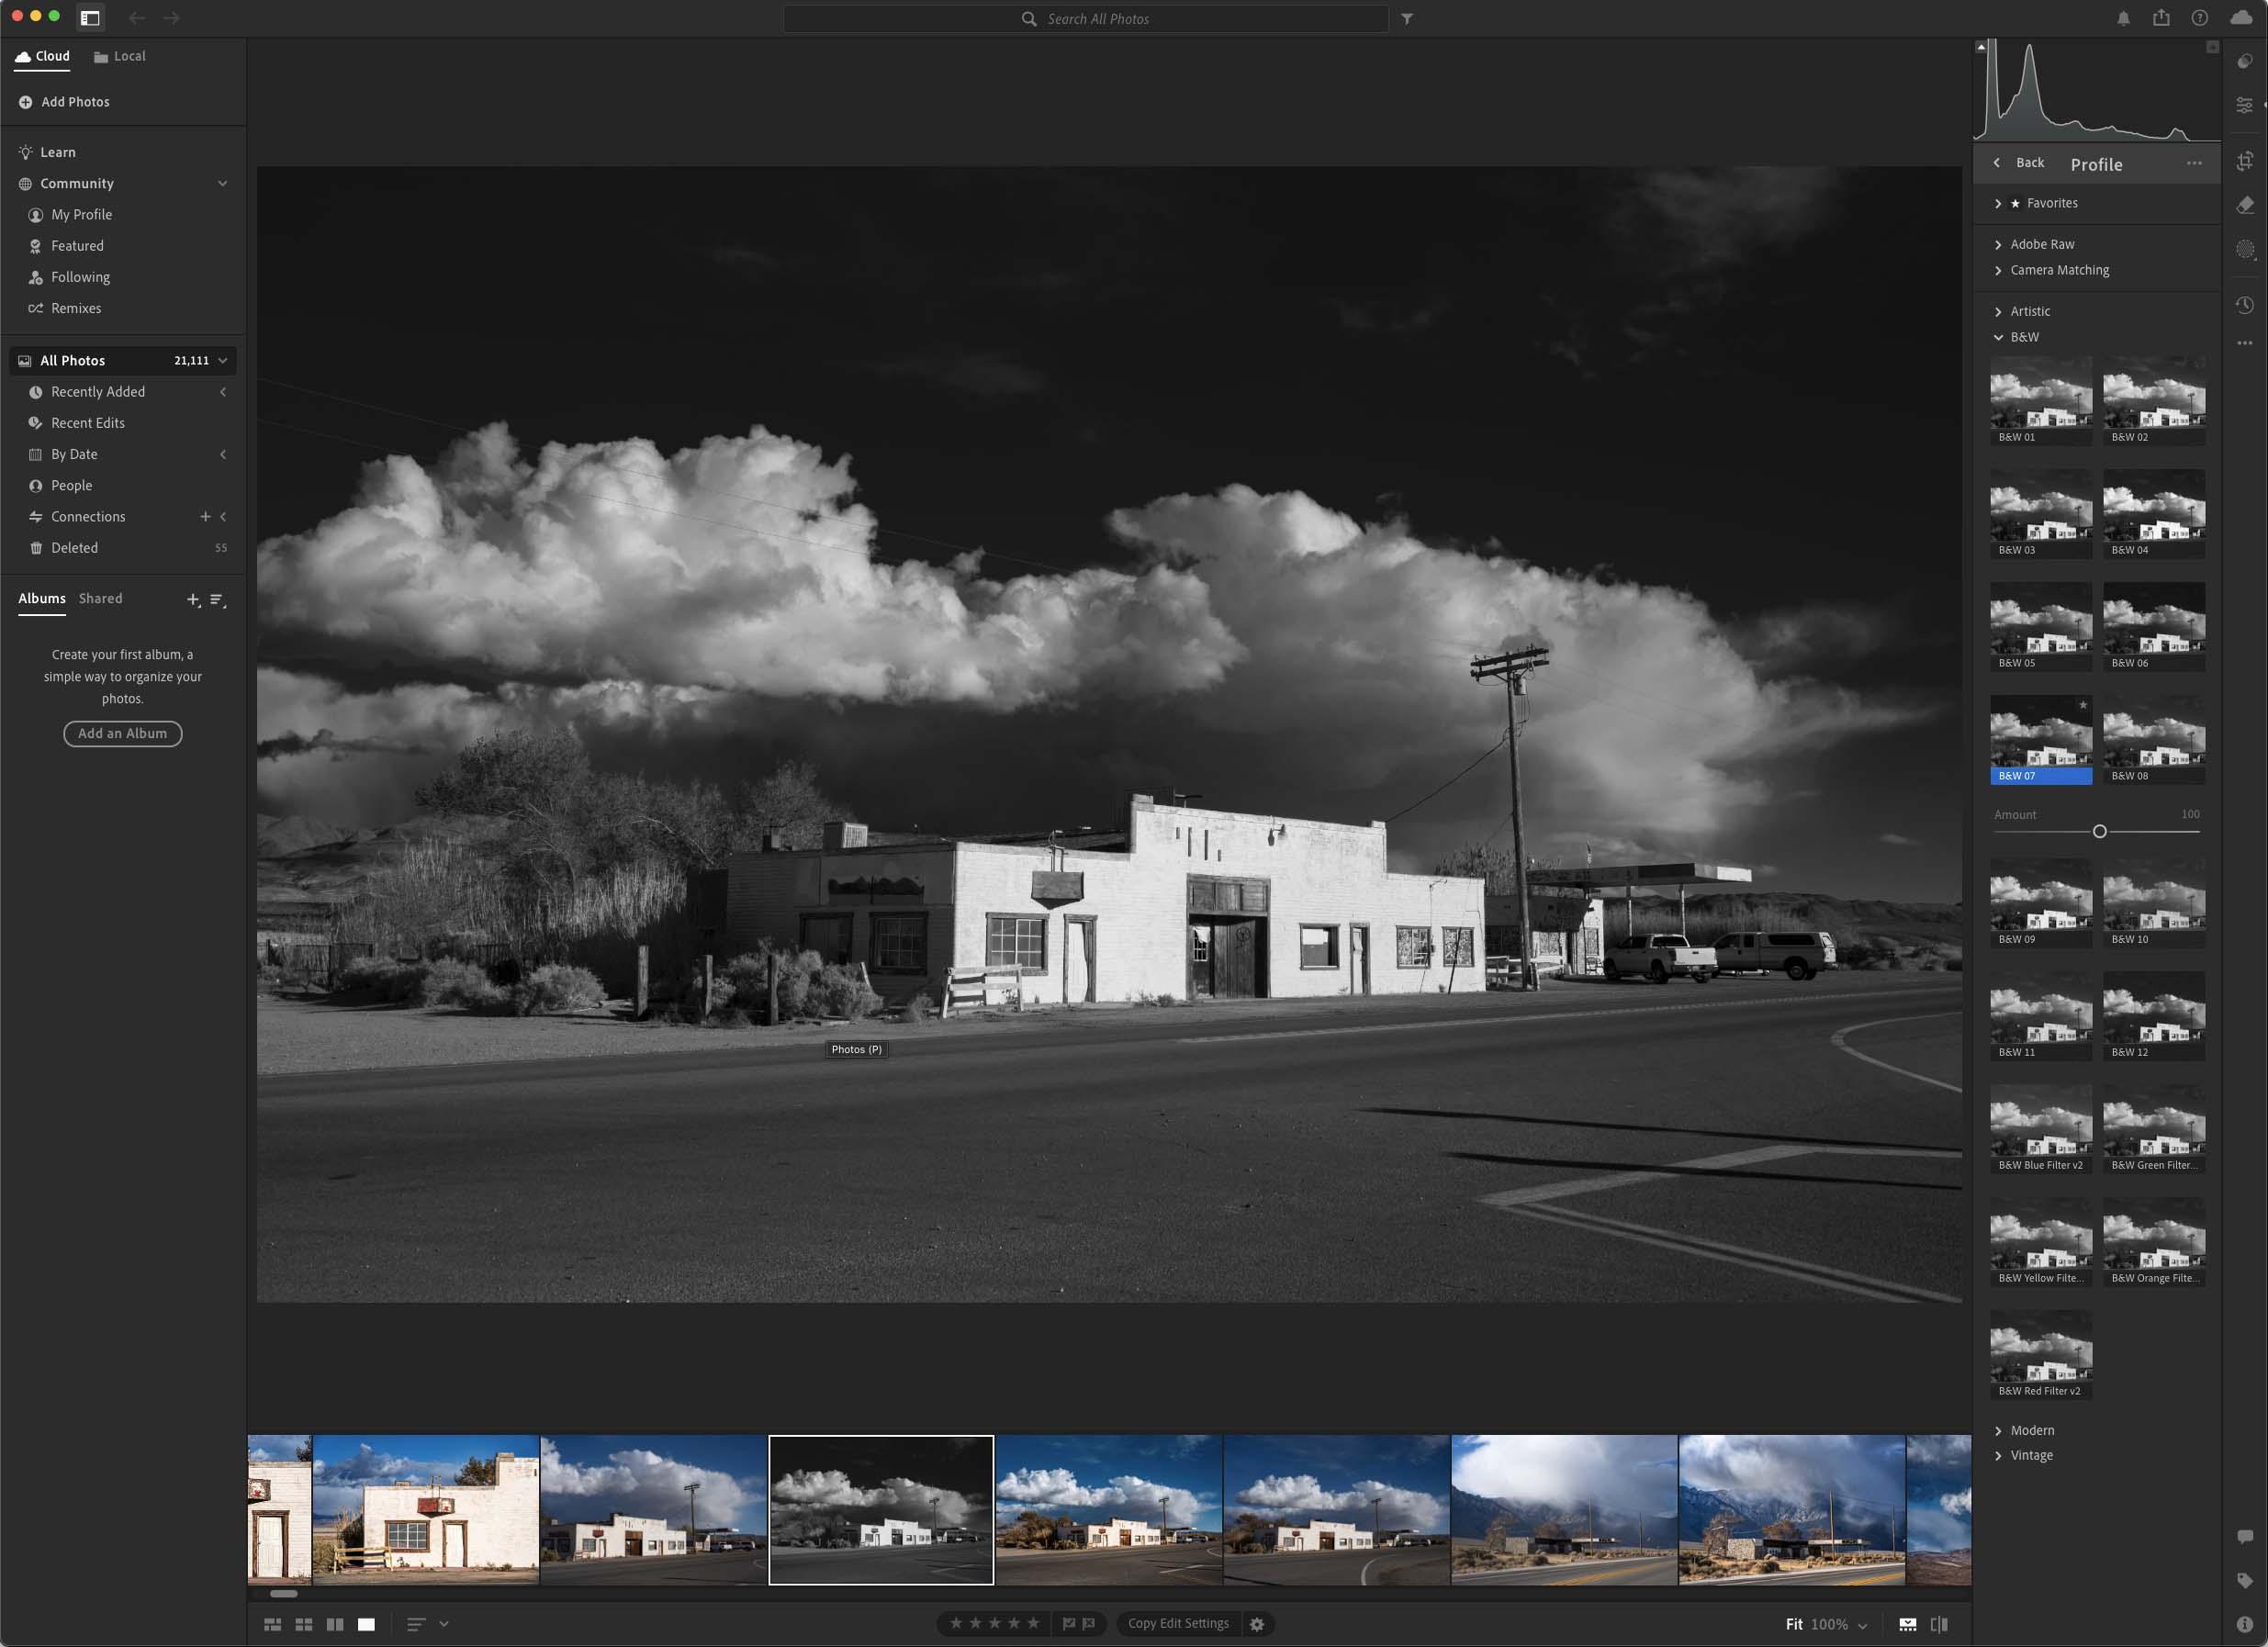
Lightroom also has a number of b&w profiles that do something similar, it’s just that they don’t say what is involved (I think it’s b&w profile #7 that is like using a red filter.)
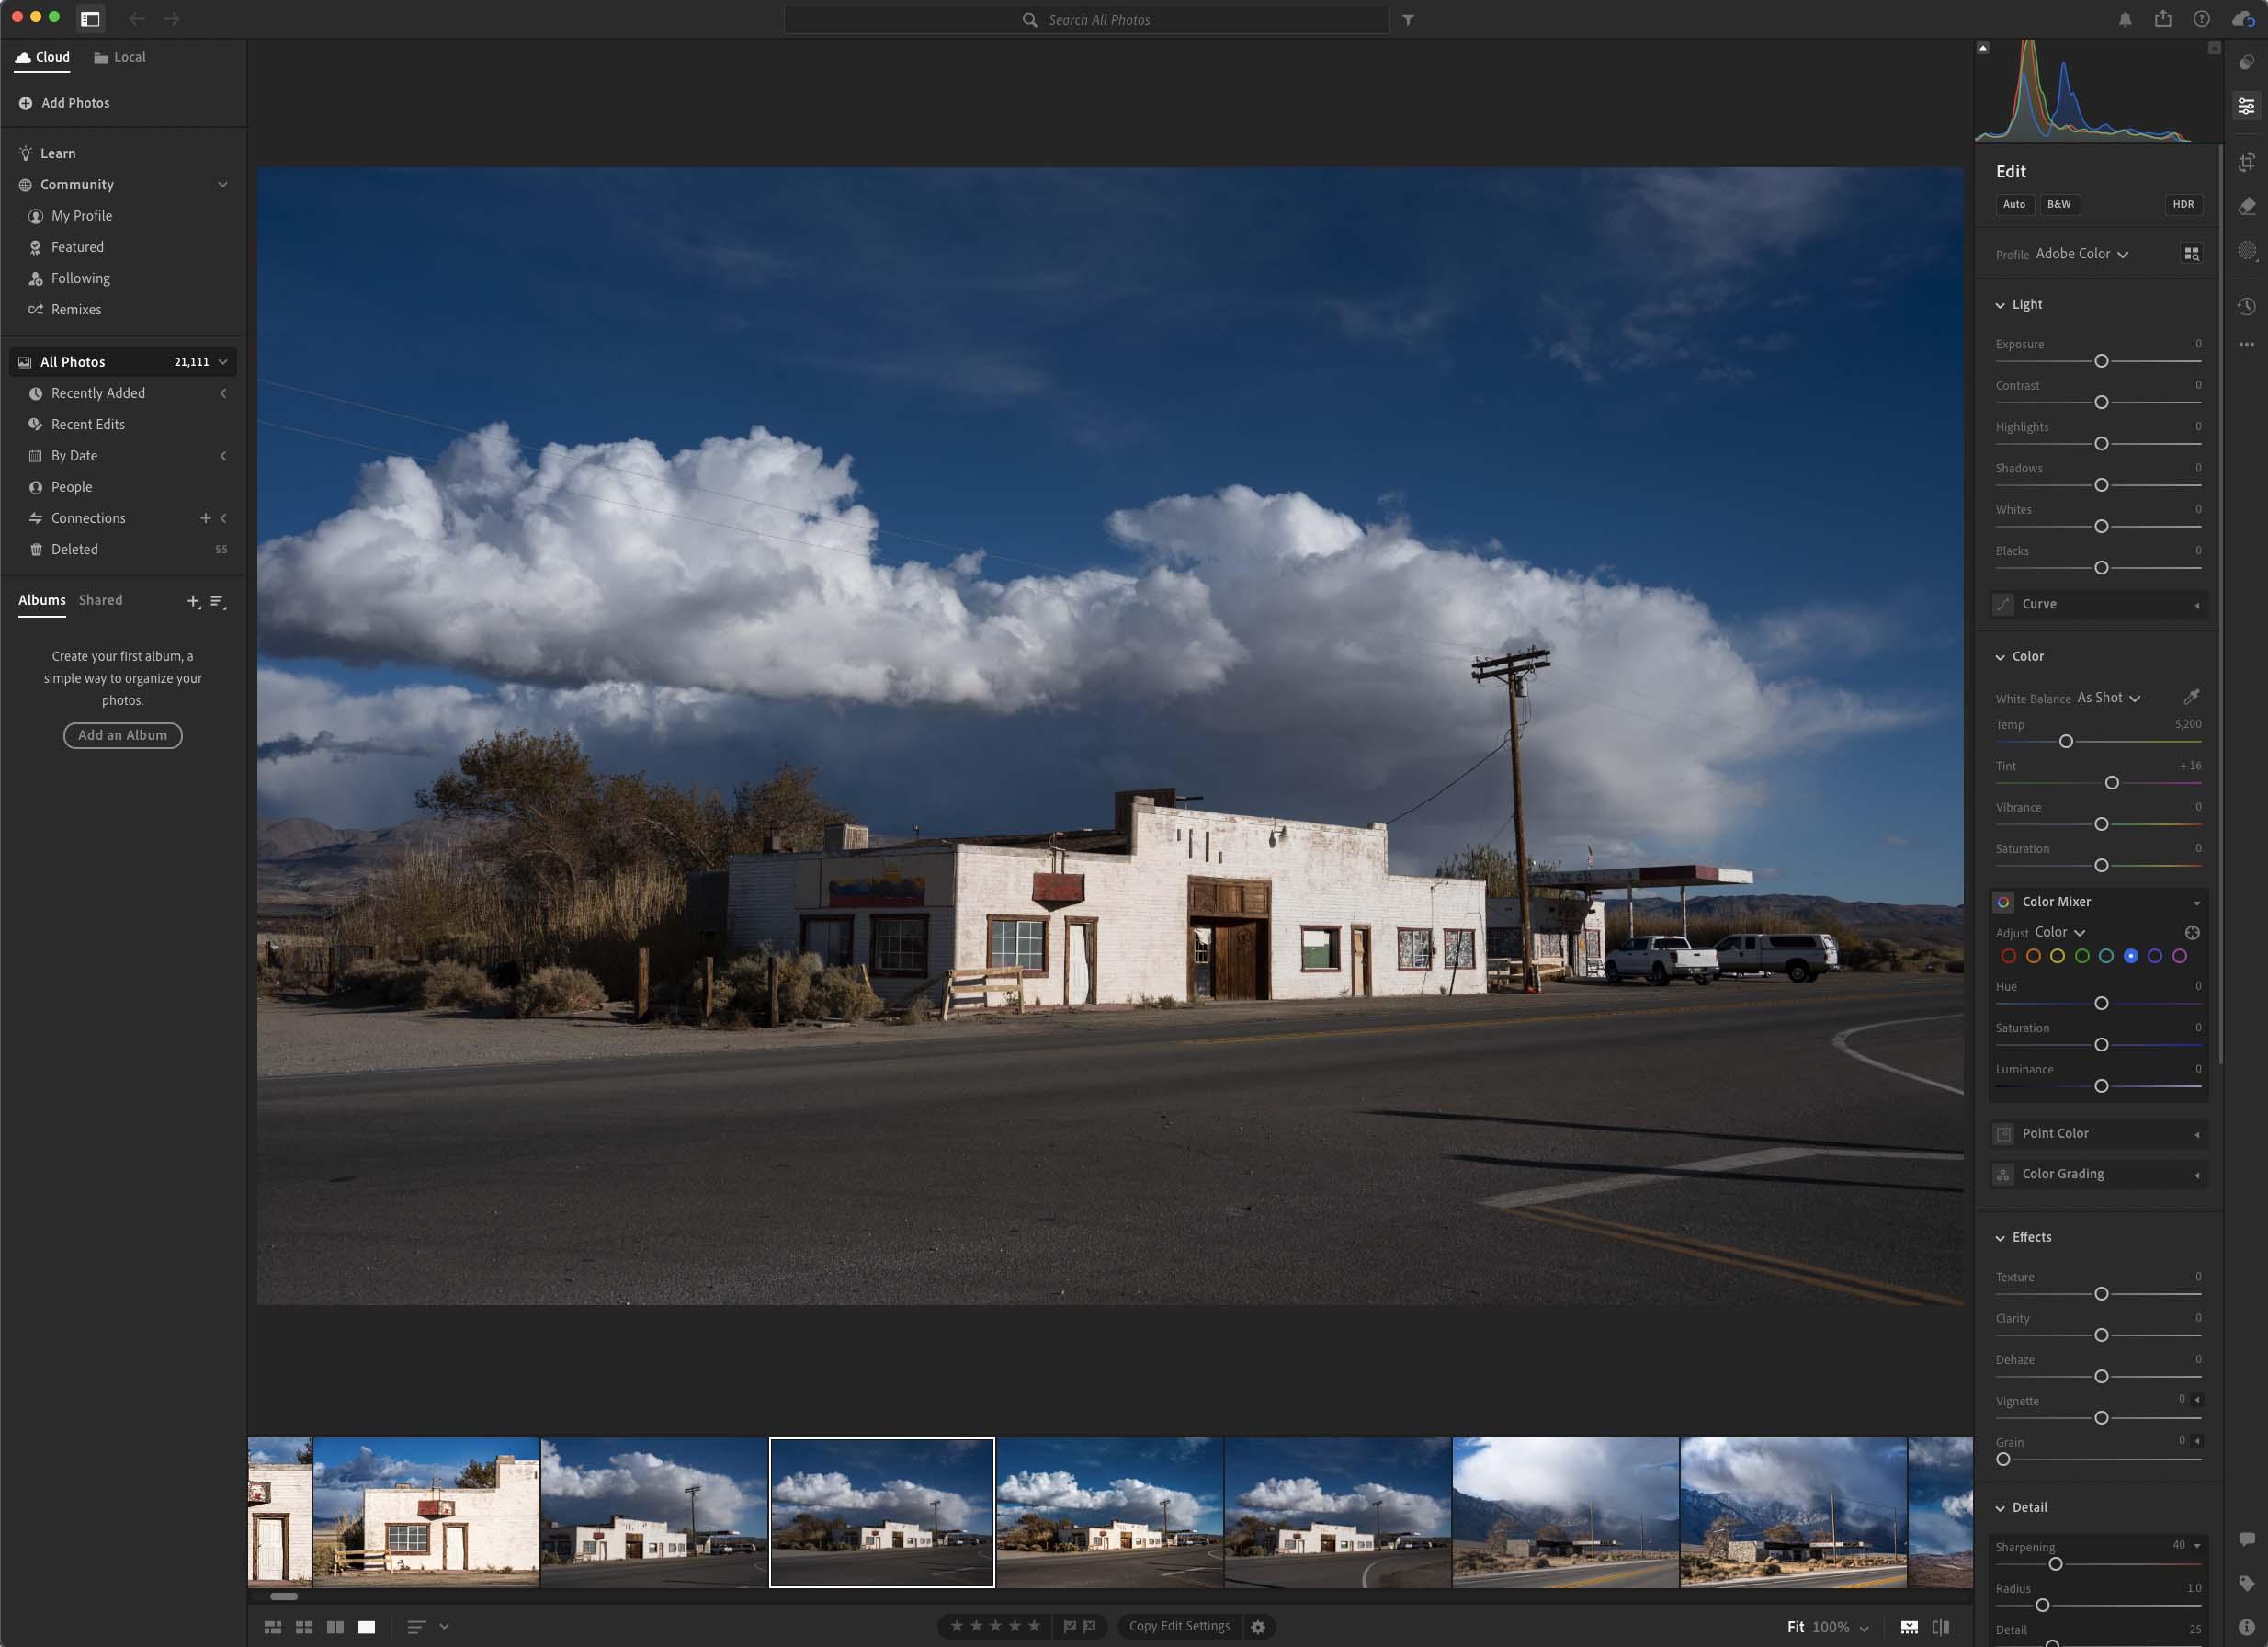
Here is a Nikon raw file I opened up in Lightroom with no corrections:
This is selecting B&W Profile #7:
-
This reply was modified 1 year, 3 months ago by
dmullenasc.
How would you set your White Balance in camera for a Scene like in 1917 in the Tunnel or the warm scene in James Bond on the Couch? I thought about settings the light to 3200K and the camera to 4800 Or what would you use? thank you
You’re thinking in terms like every light in your scene is a programmable LED that can be set to whatever color temperature you like, which is often not the case, your movie LED lights are mixed with other sources in the room that have their own color temperature, or the LED bulb itself has only one color temperature. Sure, in an abstract setting lit by one bicolor LED, all you have to do is make sure the camera is at a higher color temperature setting than the light is set at to make it render as warm. But that’s not often the case in real-world situations lit with multiple types of lights.
For example, a household tungsten light bulb is more like 2700K-2800K so would render slightly warm on a camera set to 3200K, and even warmer if the bulbs are dimmed down.
-
This reply was modified 1 year, 3 months ago by
-
This reply was modified 1 year, 3 months ago by
November 25, 2024 at 5:12 pm in reply to: “Natural” lighting continuity when a subject leave the “main light” #216523How far you can cheat or adjust a light when moving into tighter coverage depends a lot on the change in shot size and the editing pattern.
If the shots only change from a waist-up to a chest-up, it will be harder to get away with any lighting changes compared to a bigger difference, like a knees-up versus a close-up. It also depends on the editing pattern, is it likely the editor will be cutting to a different direction/person/action between your two sizes of the main character.
I think what Roger means by “no color grading in post” was that the warm color effect was created in the original photography, not created later in post. All movies are color-corrected if only to match the usual small variations in lenses, daily stock processing, shifting time of day / weather, etc.
You are forgetting that in the wide shot, there is a practical lamp with a tungsten light bulb that is driving what the supplemental soft light is doing. A household bulb through a cloth shade might be 2800K or less, so the soft light is matching that warmth. If the camera had been set to 3200K, then the lighting would read slightly warm. If one wanted even more warmth, one could set the camera higher like to 3400K or 3600K, etc.
Often your additional lighting has to take into account some practical or natural source in the room that has a certain color temperature. Sure, if the only light in the room came from an off-camera LED, then one could do any number of lighting & camera setting combinations to get a warm look.
You control soft light through placement/distance (i.e. fall-off rate), flagging (including light control tools), and to some degree, art direction (a dark wall will need less flagging that a light one.)
There are pros and cons to using grids in front of lights. They are fine if the subject is centered on the soft light but they may fall-off too quickly as they move forward and back. And if it is an overhead soft light, often you want the subject to be nearer to one edge so that they are more 3/4 frontal top lit, so a grid would be cutting off too much light that is ahead of their position. A skirt might be better in this case.
Roger has talked in the past about using vertical flags as louvers rather than use a grid.
November 13, 2024 at 6:56 am in reply to: The coordination between Camera EI (Exposure Index) and lighting. #216455The higher you set the ISO, the more you are underexposing the sensor. With cameras like the Alexa, you always capture 14+ stops of dynamic range in any ISO setting (can’t vouch for extreme choices though.) So at high ISO settings, you are capturing more highlight information (because of underexposure) and less shadow detail. The opposite at low ISO settings.
Not all cameras are “ISO invariant” though.
Keep in mind that in real world situations, your scene may not have 14+ stops of information in both directions — for example, at a low ISO outdoors, you might be sacrificing overexposure detail but the shadows may not be dark enough to benefit from more information being allowed for them.
November 11, 2024 at 3:28 pm in reply to: The coordination between Camera EI (Exposure Index) and lighting. #216437There is a certain logic to what the teacher is suggesting, which is related to ETTR (Expose To The Right) — if you have a dim scene with no bright highlights, you could shoot at a lower ISO for less noise in the shadows. And conversely if you have very hot highlights, you could shoot at a higher ISO for more highlight retention (of course, you could also not change the ISO and just expose so that highlight detail is not clipped, which might result in a darker image that will have to be brightened later.)
However, practically-speaking, if you are happy with the noise of ISO 800 and in a dark scene, do not think you’ll be attempting to bring up any shadow area in post color-correction, meaning your noise will not increase, plus you can light for exactly the amount of shadow detail you want at ISO 800 with your chosen LUT, then perhaps using a lower ISO is being unnecessarily cautious (I will admit when doing very dim scenes on stage, I might lower to ISO from 800 to 500 just to get a cleaner image for post.) Sometimes your dim or dark scene involves practical sources of a very low level, like a candle flame, a small flashlight, a streetlamp, or distant city lights, things that cannot be brighter, so lowering the ISO isn’t practical.
I also find that with the ARRI Alexa, especially now with the Alexa 35, it’s rare in bright exterior scenes where I find that the ISO needs to be raised above 800 to retain bright highlights. If I get into that situation, I’d probably just expose for the highlights I want to retain and perhaps get the DIT to make a ASC CDL adjustment to the LUT to compensate for the darker image, just so that dailies aren’t too dark-looking.
You’ll find many scenes using strongly colored lighting scattered throughout Roger’s films — immediately I’m thinking the deep blue-lit scene with Daniel Craig in his car in Shanghai in “Skyfall” and the bar scene in “Sicario”. They are tend to be logically motivated while supporting the emotions of the scene.
I learned the hard way that the main advantage of a heavy geared head is that the camera itself doesn’t create enough inertia to affect the move, the mass is centered around the head mostly and when it stops moving because you stopped turning a wheel, it stops perfectly. With a fluid head, due to inertia, the camera wants to keep moving even if you stop panning or tilting, so sometimes you can see this bobble when it stops abruptly at the end of a fast move unless the operator is really good. I recall trying to push into a pitcher of water on a table and then tilt down until I was looking straight down, and the weight of the camera caused the fluid head to want to keep tipping forward after I hit the straight down position, causing me to grab the magazine to stop it. It’s just Newton at work!
For twenty years it seems, sound was edited to a tape copy of the offline edit from the Avid, so was 23.976 with a pulldown for NTSC even if shot at 24 fps. In the sound mix, they resolved the audio speed back to 24 fps to match the image. Once Quicktime files replaced tape copies, true 24P editing and post was possible, assuming the film was scanned and stayed at 24P, but because HD and UHD video is 23.976 to stay backwards compatible with SD broadcast, most post work is still 23.976 which means it is easier to just shoot at 23.976. Doesn’t have to be that way but if you shoot at 24P, you just have to make sure someone is keeping track through post.
It’s fairly easy to convert a 23.976 project to 24 for a DCP — the main issue is resolving the sound to be in sync with the change. Image-wise, there is no difference, you are shooting whole frames and just playing them back at 24 fps instead of 23.976 fps.
Since HD broadcast is 59.94i, any true 24 fps material is shown at 23.976 fps. Any film shot at 24 fps is transferred to video for dailies at 23.976 fps as well. The main issue, as I said, is a sound sync issue, the speed of the recording and the speed of the playback, the sound mix, the mastering, etc. Someone has to keep track of that.
I made this mistake, or post did, on my first HD feature back in 2001 on the Sony F900, which had the option for either 23.976 or 24 fps. Since we were planning a film-out for projection, I shot at 24 fps. Later I asked the editor how the final mix was going and she said fine except that the sound was drifting on every reel and they were manually syncing it back. I realized that this was because I shot 24 but sound had been posted using a 23.976 video copies.
-
This reply was modified 1 year, 3 months ago by
-
AuthorReplies